1 How to Get Rid of Bing in Windows 102 How to Remove Bing from Windows 10 via Registry File
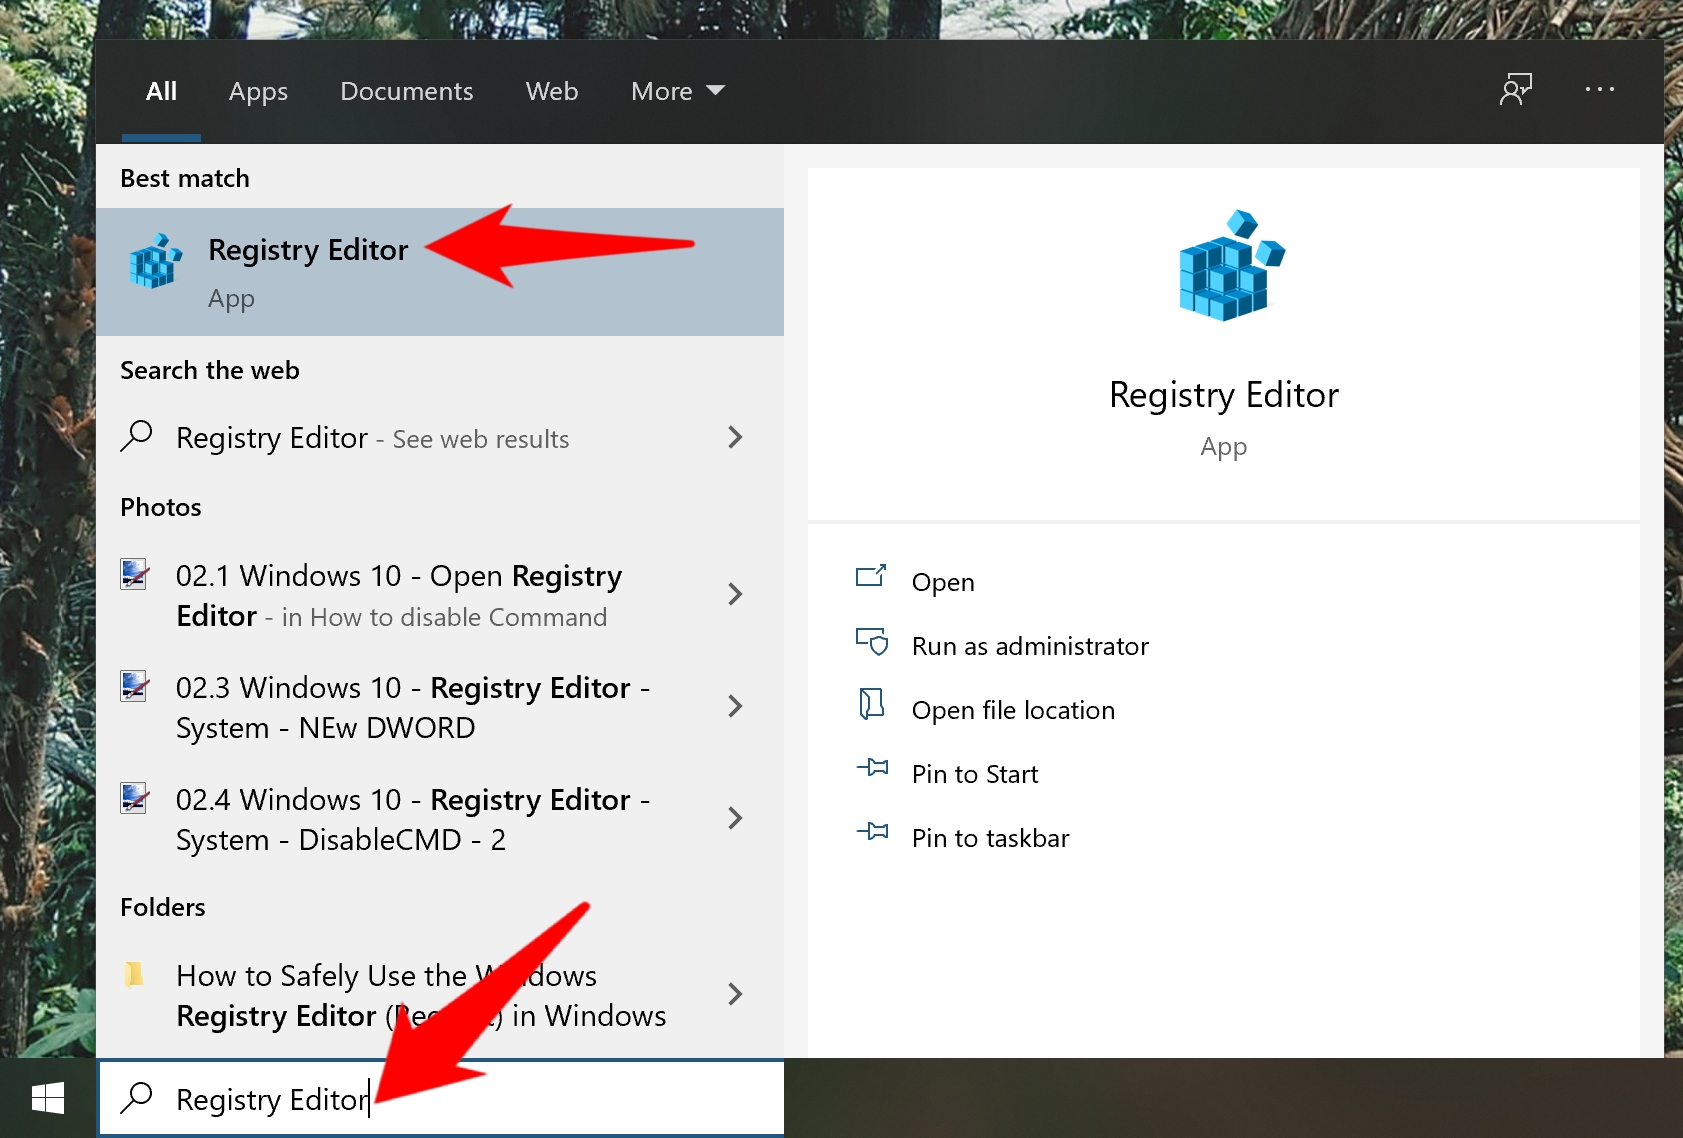
Though previous versions of Windows 10 allowed you to turn off web search via Cortana settings, that’s no longer the case. You will have to manually disable web search in Windows 10 by adding an entry in your registry. In the guide below, we’ll walk you through the exact steps to do this so that you can understand and learn from the process. However, if you just want a quick fix, you can use our provided registry file to remove Bing from Windows 10 in a single click. Whichever method you choose, it’s worth noting that this fully disables Bing in Windows Search. You’ll still be able to look for files, documents, and apps through search and we’ll show you how to reverse the changes at any point. Let’s get started:
How to Get Rid of Bing in Windows 10
How to Remove Bing from Windows 10 via Registry File
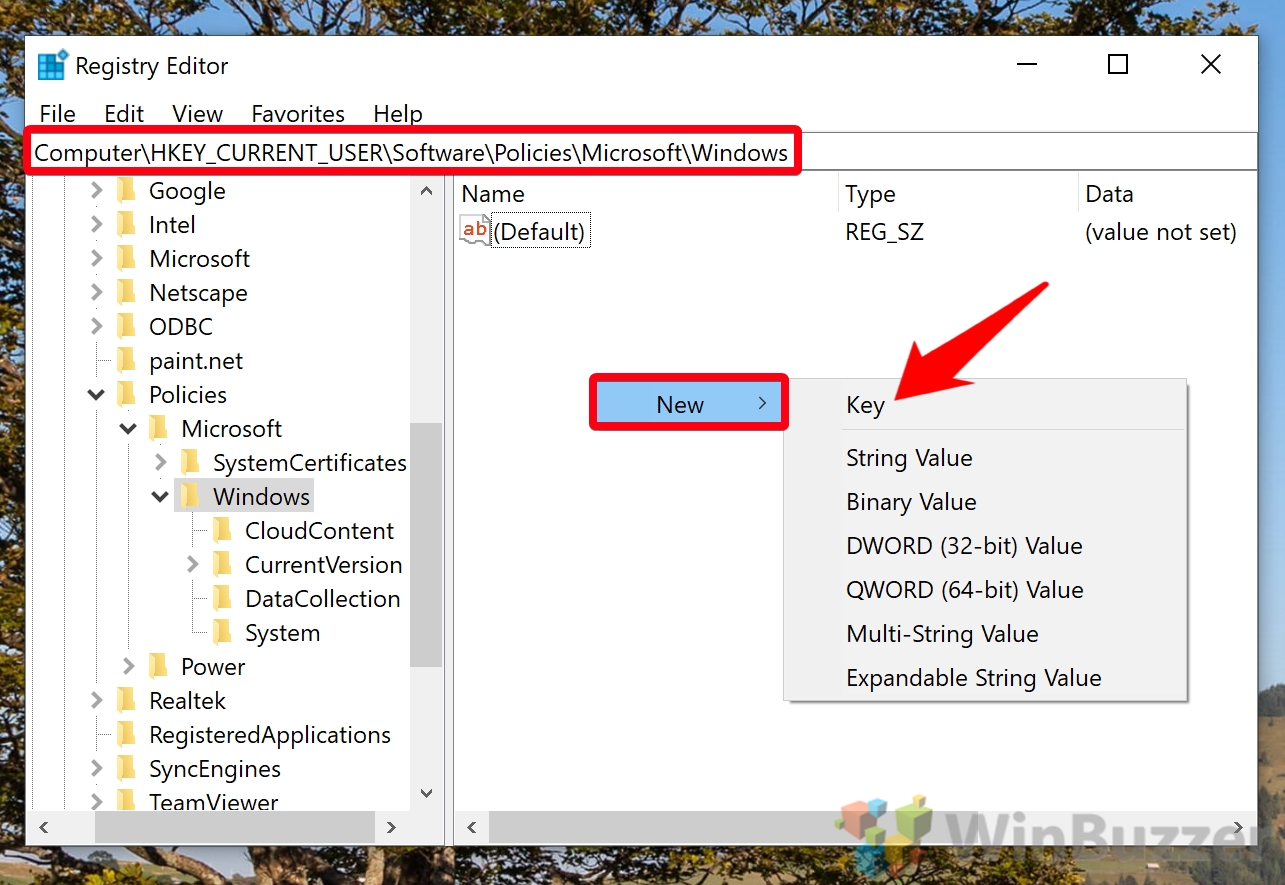
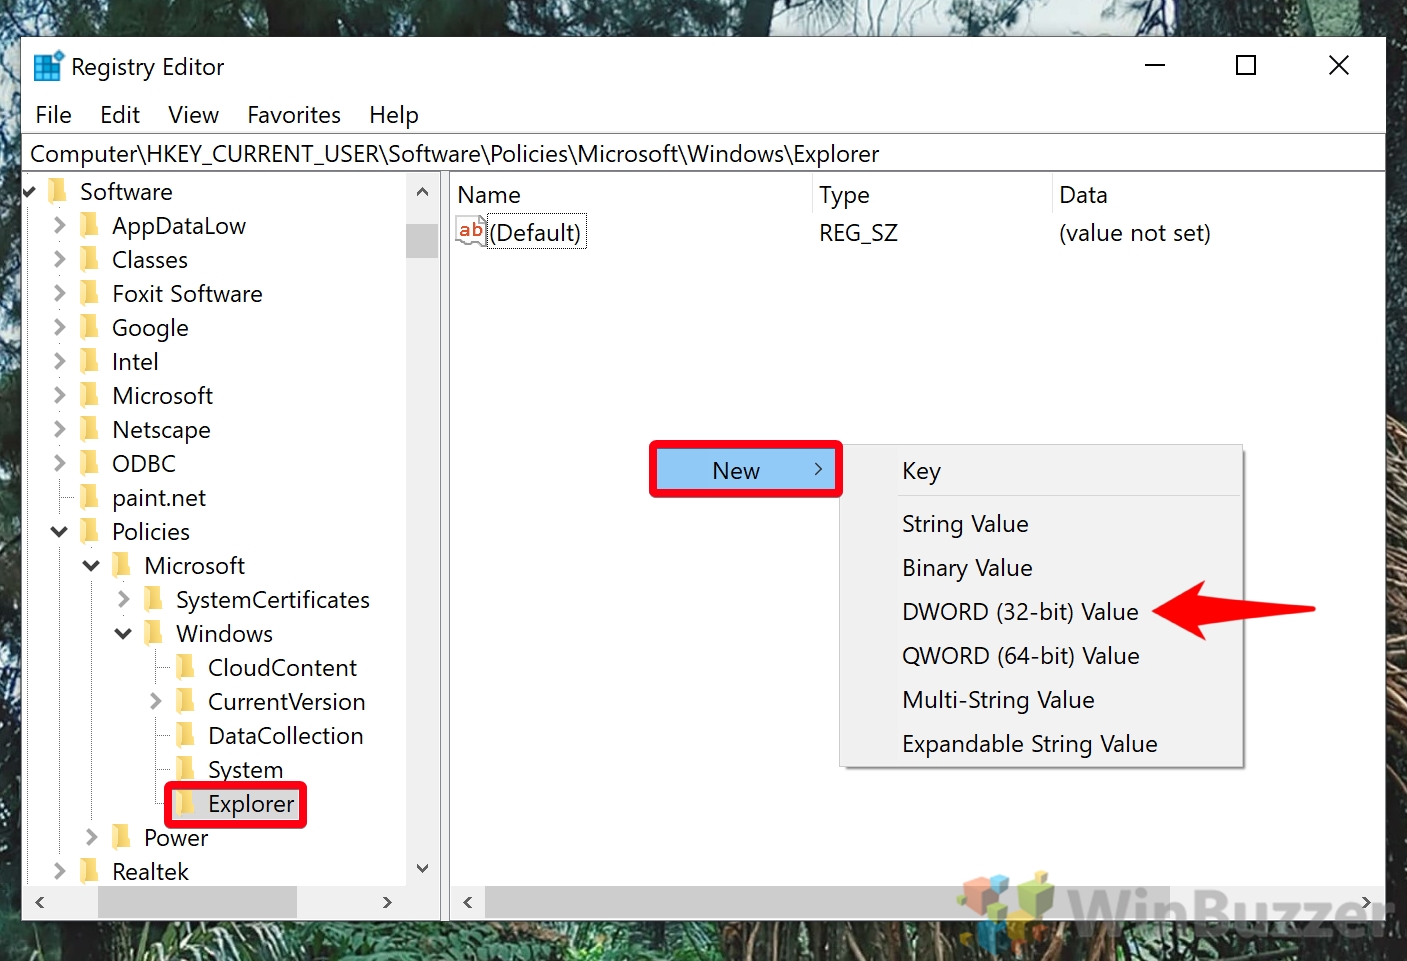
Once you’re there, right-click the main pane and select “New > Key”. Name the key Explorer.
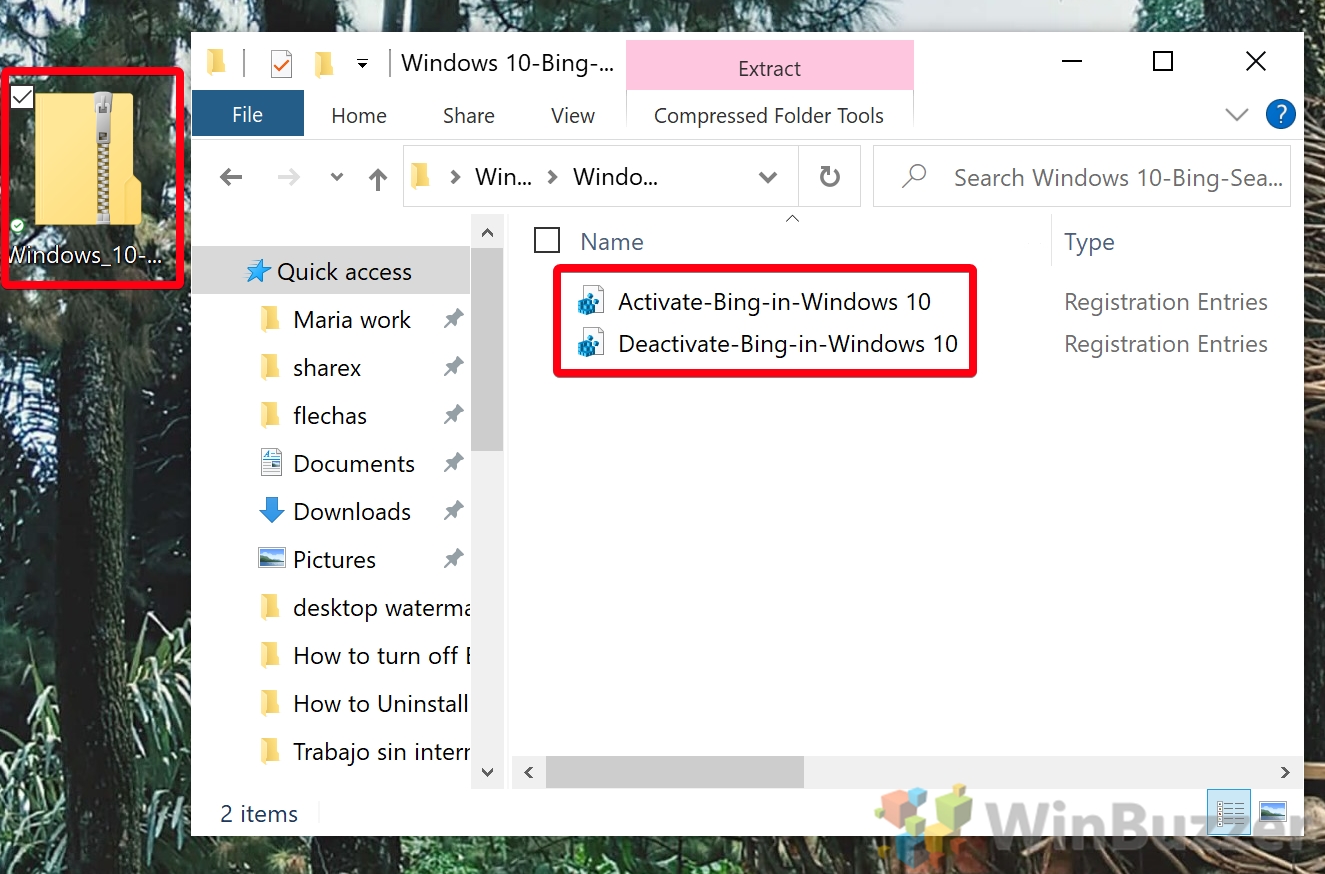
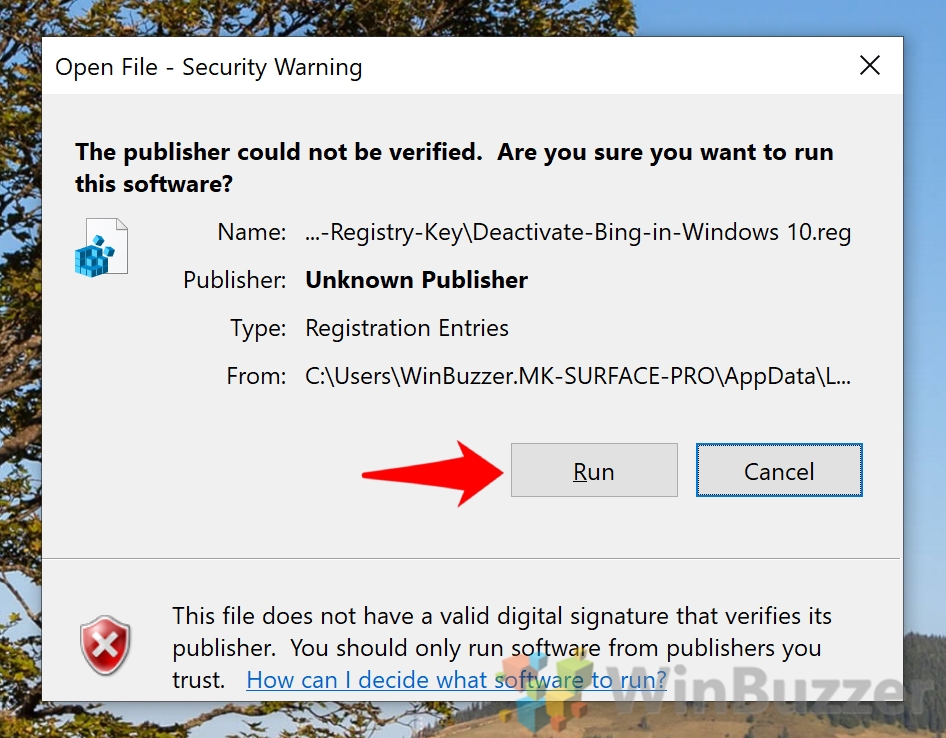
Download the file “Windows 10 Remove Bing Search Registry Key.zip” to your desktop and extract it to its own folder. Please ensure you keep a copy of the activation registry file in case you want to enable it again later.
After a reboot Bing will be missing from your Windows 10 search results. Ultimately, this should make it easier to find the files you’re looking for. Meanwhile, if you want to retain the convenience of integrated search but don’t like Bing, you can follow our guide to replace Bing search with Google.

